Ghillie Suit Construction Part 2
If you want hands-on training in the marksmanship and fieldcraft skills of military snipers, including building your own ghillie suit, checkout our SniperCraft class schedule.
In Ghillie Suit Construction Part 1, we prepared a set of BDU’s and a Boonie hat with vent mesh installed.
For Part 2 and 3, you will need:
- A good strong nylon net with squares that are .5 inch to 1.5 inches. I prefer 1-inch squares.
- More E6000 glue or a good seamstress.
- A cheap yoga mat.
- Some fine veil material neutral in color. Or you can buy one at Tactical Concealment for a very reasonable price.
- About 5 to 6 square feet of canvas.
Make sure to get the netting and canvas in a dull neutral color. While we won’t use all of these materials in this part, you might as well get them in advance.
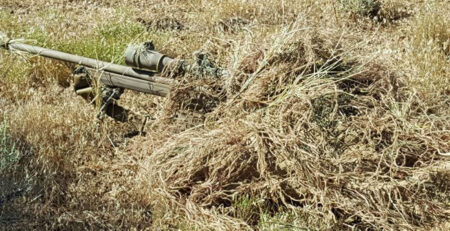
Let’s start with the boonie hat. As described before, the brim should be cut down and there should be a large opening on top with vent mesh covering it. Cut some of the nylon netting in pieces that cover the entire radius of the hat with uneven pieces hanging over the edge of the brim. I like to leave front a bit longer than the back so it can be draped over the optic on your rifle when you are on the gun. Also cut a piece to go over the vent on top. Now simply glue these into place. I like to place glue at every second square. Some snipers like more points of attachment. This is a personal preference. Just try not to make too much of a pattern with the glue placement. Once you have your head piece glued set it aside to dry.
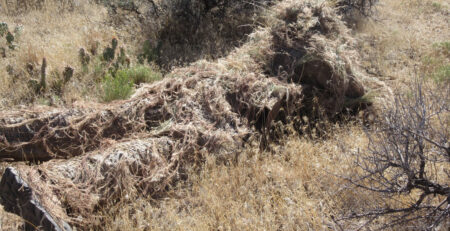
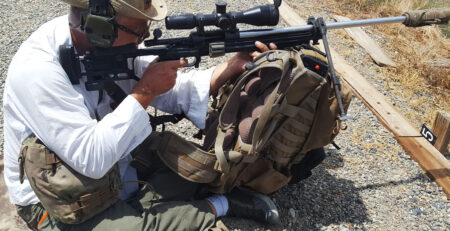
Now let’s do the BDU shirt. Most Ghillie suits are made to be used in a traditional stalk. Meaning in the prone position or a low crawl movement. So, you won’t need netting on the front except for the front of the shoulders. So, flip that BDU shirt over so it is back-side up. Now cut pieces of netting to cover the entire back and leave a “tail” about 6 to 8 inches long to cover the waist line. Also cover the arms all the way to the wrists and cover the front of the shoulders. Remember, you can add or cut some netting off later, so don’t sweat this part. Get all this netting glued down making sure that it will not restrict the natural contour of your arms and shoulders. This is the one step that I wish I had a dress making mannequin like Buffalo Bill.
Let his all dry for 24 hours before trying it on and seeing if there are any restrictions in movement or if the coverage needs adjustment. Once you are happy with the netting placement it’s time to do the front. This is where a buddy can help you out. Put your Ghillie suit top on and get down on the floor laying perfectly flat with your arms out front with a 45-degree bend in them. And I mean flat like someone is shooting at you! Now have your buddy take a sharpie and draw a line from your biceps to your wrists where the suit meets the floor. Just a dotted line will do. Make sure you do the outside of the arm and the inside of the arm.